
How to Connect a Vex Motor to a Vex Gear

Introduction
Welcome, swain roboticists. If yous are having a strange clicking racket coming from your VEX EDR 393 motor, odds are the gears are stripped and need to be replaced. Lucky for you lot, the following guide shows y'all how to safely and properly replace the gears within. Please carefully read and follow the steps below and you will accept your motor working like new in no time!
Parts
No parts specified.
-
-
Disconnect the motor from any other connected devices or ability sources.
-
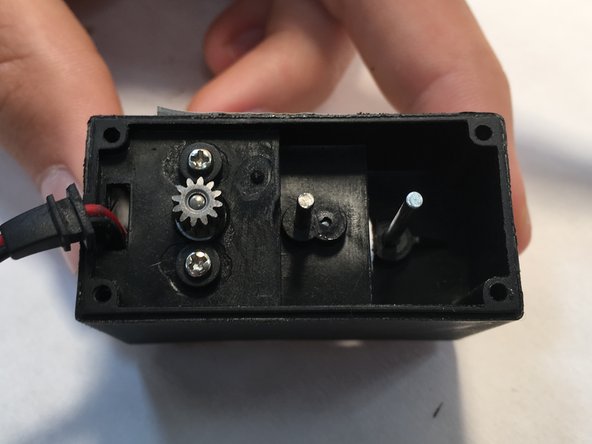
Use a Small-scale Phillips Head Screwdriver to unscrew the 4 screws from the blackness casing's corners.
-
-
-
Pull off the black bottom casing.
-
Remove the two gears inside.
-
-
-
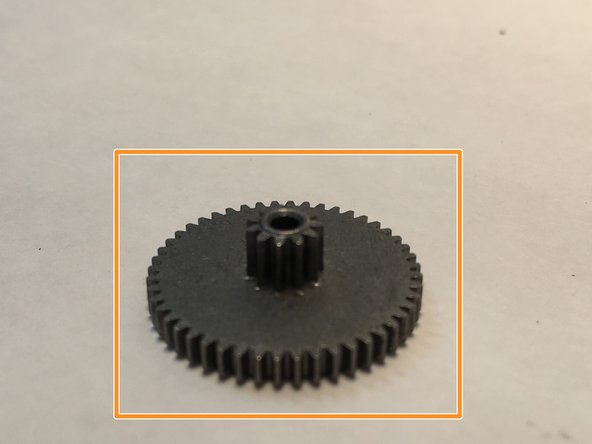
Select the replacement gears that match the gears you just removed.
-
Take the gear that has teeth on its entire length and insert it onto the metal pivot. Push it all the style into the lesser of the motor. It should connect with a small-scale gear on the bottom.
-
Now, insert the larger gear with teeth on the base onto the circular plastic peg.
-
Supervene upon the black lesser casing and screws.
-
-
-
Utilize a Small Phillips Head Screwdriver to unscrew the four screws from the light-green casing's corners.
-
-
-
Pull off the green top casing.
-
Remove the 2 gears inside.
-
-
-
Supersede the old stripped gears with the remaining replacement gears.
-
Place the gear with the long stem into the larger gap.
-
Place the smaller gear into the motor.
-
-
-
Replace the light-green superlative casing.
-
Ensure the casing fits betwixt the ridges on the wires' prophylactic collar.
-
Use a Small Phillips Head Screwdriver to supercede the four screws.
-


Almost done!
Your motor should be working again. Before reinstalling it on your robot, examination it either with a fill-in battery or by plugging it in to your cortex. If yous hear more grinding or annihilation out of the ordinary, reopen the motor to make sure the gears are aligned.
You can as well use this process to change the gear ratio of the motor for different functions.
Decision
Your motor should be working again. Before reinstalling it on your robot, exam it either with a backup battery or by plugging it in to your cortex. If you hear more grinding or anything out of the ordinary, reopen the motor to make certain the gears are aligned.
You lot can also use this process to change the gear ratio of the motor for dissimilar functions.

Team

One Annotate
DOWNLOAD HERE
How to Connect a Vex Motor to a Vex Gear UPDATED
Posted by: jaygialren.blogspot.com
does anyone sell repair kits from cleaved off wires. I take 30 motors with wires torn off (because of the 100 students)
Bob Hankinson - Answer